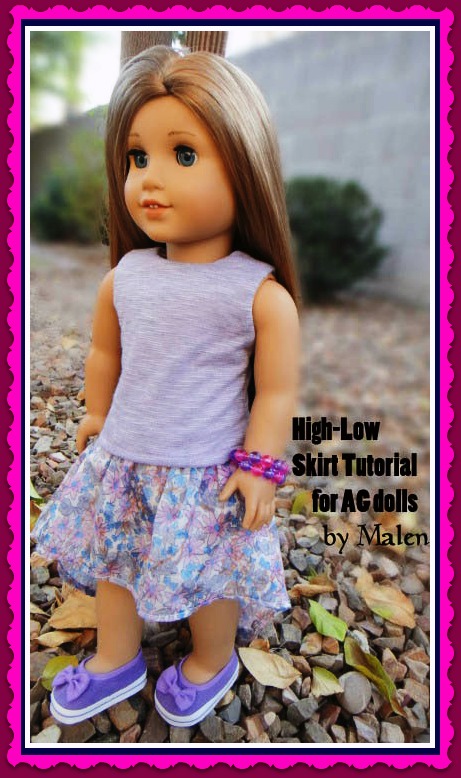
High Low Skirt for American Girl Dolls
I have been wanting to make a tutorial on high low skirt ever since I saw it in the Forever21 store. The style that I saw is a black chiffon skirt that’s flowy and has a tiny belt in the waist. But then I got sidetracked by other stuff and decided to postpone it for a while. And then Liberty Jane came out with a high low dress, Outback Libby Woomera and it sold for $197.50 in ebay, wow! Well, it’s a very pretty one of a kind outfit; the chiffon dress is stunning and the jacket has amazing details. So this tutorial might be timely, since LJ came out with the high low trend so I am sure people will be wanting one for their dolls.
Materials:
For the skirt, make sure you use a thin fabric with a nice flow to it. Examples are cotton knit or jersey knit and rayon. I would say sheer fabric such as chiffon works best for this kind of style but they are very hard to work it especially if you are a beginner. In my tutorial, I actually use a woven fabric but its very thin and light so it ended up looking nice. I don’t think this would work with a thick cotton fabric as it might not drape nicely.
I actually made two versions of this skirt. The first tutorial is the simpler version which uses the basic steps for making a skirt. In the second version I made, I used the circle skirt method that I posted in this blog. This is a lot harder so this might not be easy for beginners. However, the fabric drapes nicely with this method. For this type of skirt, I would say FABRIC MATTERS a lot in order to get great results.
METHOD 1 – BASIC SKIRT METHOD
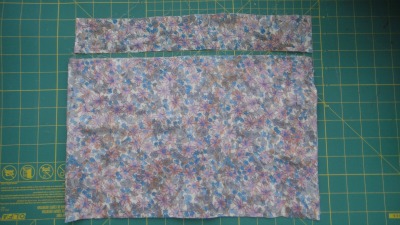
1) Cut your fabric according to this measurement:
By L , I am referring to the length / height of the fabric
By W, I am referring to how wide the fabric is
Waistband – 2 inches L x 13.5 inches W
Skirt – 8 inches L x 30 inches W
The main skirt is folded here that’s why it does not look wide, but its cut at 30 inches width.
Please note that all seams are sewn at 1/4 inch allowance.
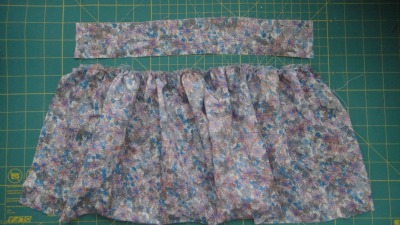
2) Gather the main skirt so its the same width as your waistband.

3)Sew the waistband. Check out the tutorial here on how to make the waistband.
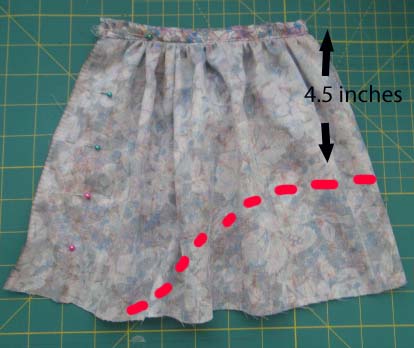
4) With right sides together, fold the skirt in half, making sure to join the back seams together. Pin to keep in place. Measure 4.5 inches from the waistband and mark it. That is your starting point for cutting the skirt. Cut it in tapered form as indicated in the picture. The short side will be the front part of the skirt and the long part is the back of the skirt.
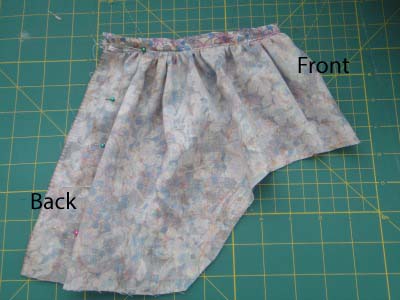
5) This is what the skirt will look like after you cut it.

6) Hem the skirt. I did mine by doing a rolled hem so I have to do a lot of pinning. If you want, you can just zigzag the edges and then fold it about 1/4 inch to hem.

7) Feed the elastic through the casing. I used a 10 1/2 inch elastic for the waist.
8) Sew the back seam to finish the skirt.
METHOD 2 – CIRCLE SKIRT METHOD
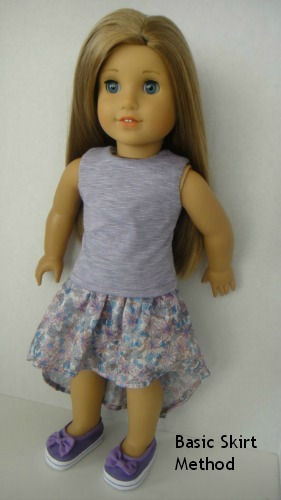
For sewing a high low skirt using the circle skirt method, I used the steps I made in this tutorial. And then I just determined the front part of the skirt and cut it in that area similar to step 4 of the first method. Then I cut the back part so it would be easier to hem and attach the elastic. Below are the results of the sewing I did using these two methods. Personally, I like the first method because its easier but maybe for a more professional looking skirt, the second method might be more appropriate.
 |
 |

